# Python install
**Introduction**
**Python** is a popular programming language often used to write scripts for operating systems. It’s versatile enough for use in web development and app design.
**In this tutorial you will learn how to install Python 3.8 on Ubuntu 18.04 or Ubuntu 20.04.**
Prerequisites
* A system running Ubuntu 18.04 or Ubuntu 20.04
* A user account with **sudo** privileges
* Access to a terminal window/command-line (**Ctrl**–**Alt**–**T**)
* Make sure your environment is configured to use Python 3.8
### Option 1: Install Python 3 Using apt (Easier)
This process uses the **apt package manager** to install Python. There are fewer steps, but it’s dependent on a third party hosting software updates. You may not see new releases as quickly on a third-party repository.
Most factory versions of Ubuntu 18.04 or Ubuntu 20.04 come with Python pre-installed. [Check your version of Python](https://phoenixnap.com/kb/check-python-version) by entering the following:
```
python --version
```
If the revision level is lower than 3.7.x, or if Python is not installed, continue to the next step.
#### Step 1: Update and Refresh Repository Lists
Open a terminal window, and enter the following:
```
sudo apt update
```
#### Step 2: Install Supporting Software
The software-properties-common package gives you better control over your package manager by letting you add PPA (Personal Package Archive) repositories. Install the supporting software with the command:
```
sudo apt install software-properties-common
```
#### Step 3: Add Deadsnakes PPA
Deadsnakes is a PPA with newer releases than the default Ubuntu repositories. Add the PPA by entering the following:
```
sudo add-apt-repository ppa:deadsnakes/ppa
```
The system will prompt you to press enter to continue. Do so, and allow it to finish. Refresh the package lists again:
```
sudo apt update
```
#### Step 4: Install Python 3
Now you can start the installation of Python 3.8 with the command:
```
sudo apt install python3.8
```
Allow the process to complete and verify the Python version was installed sucessfully::
```
python --version
```

### Option 2: Install Python 3.7 From Source Code (Latest Version)
Use this process to download and compile the source code from the developer. It’s a bit more complicated, but the trade-off is accessing a newer release of Python.
#### Step 1: Update Local Repositories
To update local repositories, use the command:
```
sudo apt update
```
#### Step 2: Install Supporting Software
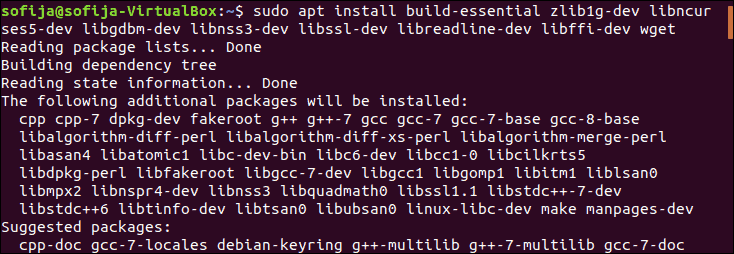
Compiling a package from source code requires additional software.
Enter the following to install the required packages for Python:
```
sudo apt install build-essential zlib1g-dev libncurses5-dev libgdbm-dev libnss3-dev libssl-dev libreadline-dev libffi-dev wget
```

#### Step 3: Download the Latest Version of Python Source Code
To download the newest release of Python Source Code, navigate to the **`/tmp`** directory and use the **`wget`** command:
```
cd /tmp
```
```
wget https://www.python.org/ftp/python/3.7.5/Python-3.7.5.tgz
```
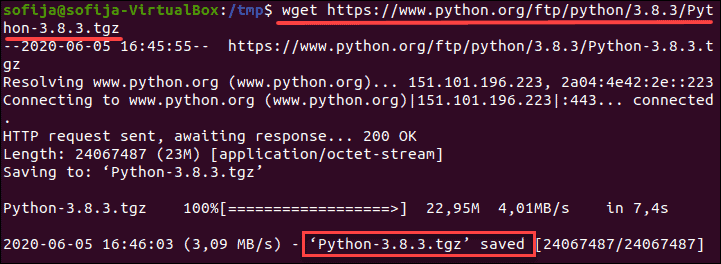
**Note:** The source code is different from the software found on the main download page. At the time this article was written, Python 3.7.5 was the latest version available.
#### Step 4: Extract Compressed Files
Next, you need [to extract the tgz file](https://phoenixnap.com/kb/extract-tar-gz-files-linux-command-line) you downloaded, with the command:
```
tar -xf Python-3.8.3.tgz
```
#### Step 5: Test System and Optimize Python
Before you install the software, make sure you test the system and optimize Python.
The **`./configure`** command evaluates and prepares Python to install on your system. Using the **`--optimization`** option speeds code execution by 10-20%.
Enter the following:
```
cd python-3.8.3
```
```
./configure --enable-optimizations
```
This step can take up to 30 minutes to complete.
#### Step 6: Install a Second Instance of Python (recommended)
To create a second installation of Python 3.835, in addition to your current Python installation, enter the following:
```
sudo make altinstall
```
It is recommended that you use the **`altinstall`** method. Your Ubuntu system may have software packages dependent on Python 2.x.
**(Option) Overwrite Default Python Installation**
To install Python 3.8.3 over the top of your existing Python, enter the following:
```
sudo make install
```
Allow the process to complete.
#### Step 7: Verify Python Version
Enter the following:
```
python3 --version
```
**Note:** If you are starting with Python and are still looking for the right IDE or editor, see our comprehensive overview of the [best Python IDEs and code editors](https://phoenixnap.com/kb/best-python-ide-code-editor).
### Using Different Versions of Python
If you used the **`altinstall`** method, you have two different versions of Python on your system at the same time. Each installation uses a different command.
Use the **`python`** command to run commands for any older Python 2.x version on your system. For example:
```
python --version
```
To run a command using the newer version, use **`python3`**. For example:
```
python3 --version
```
It is possible to have multiple major (3.x or 2.x) versions of Python on your system. If you have Python 3.7.x and Python 3.8.x both installed, use the second digit to specify which version you want to use:
```
python3.7 --version
```
```
python3.8 --version
```
Conclusion
You should now have a working installation of Python 3 on your Ubuntu system. Next, consider [installing PIP for Python](https://phoenixnap.com/kb/how-to-install-pip-on-ubuntu) if you haven’t already.
With everything set, you can start with some basics scripts like [getting the current time and date in Python](https://phoenixnap.com/kb/get-current-date-time-python) or learn [file handling in Python](https://phoenixnap.com/kb/file-handling-in-python) with built-in methods, which include creating, opening, and closing files.
---
# Agent Instructions
This documentation is published with GitBook. GitBook is the documentation platform designed so that both humans and AI agents can read, navigate, and reason over technical content effectively. Learn more at gitbook.com.
## Querying This Documentation
If you need additional information that is not directly available in this page, you can query the documentation dynamically by asking a question.
Perform an HTTP GET request on the current page URL with the `ask` query parameter:
```
GET https://tritueviet.gitbook.io/server/python-install.md?ask=
```
The question should be specific, self-contained, and written in natural language.
The response will contain a direct answer to the question and relevant excerpts and sources from the documentation.
Use this mechanism when the answer is not explicitly present in the current page, you need clarification or additional context, or you want to retrieve related documentation sections.